Crochet Catchall Tray With Pinched Corners in Three Sizes
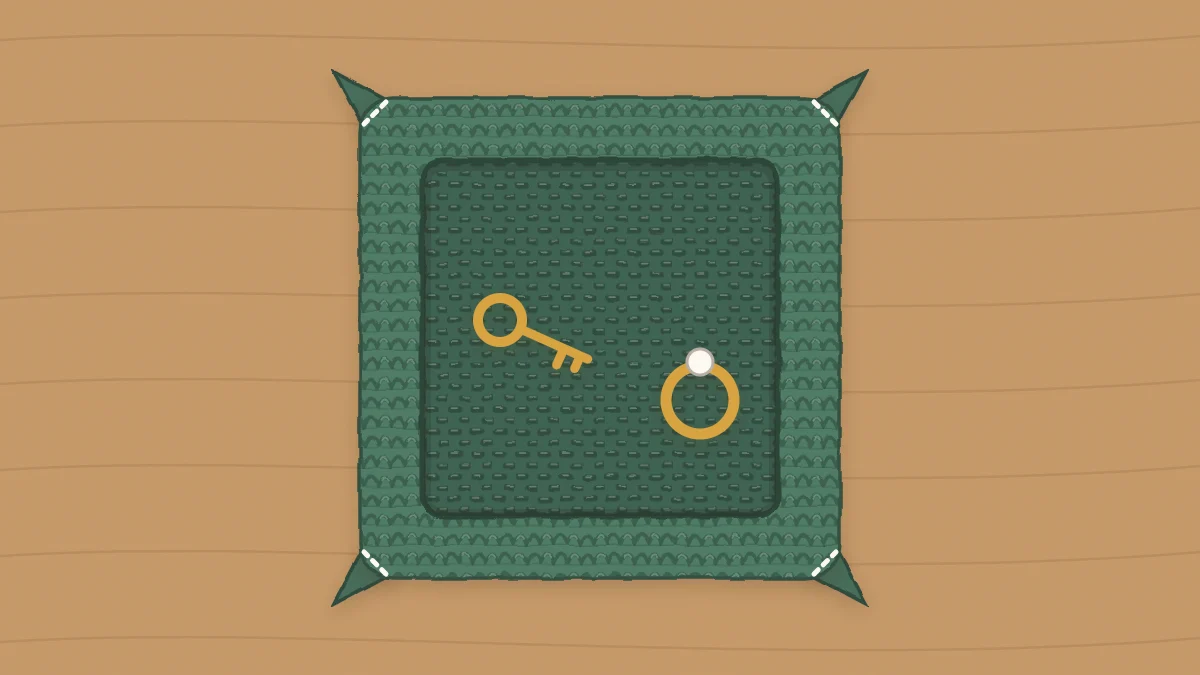
A small square crochet catchall tray made from a flat single crochet square: pinch and stitch the four corners to raise the sides. Three sizes for keys, jewelry or remotes.
Project at a glance
Materials
- About 35 to 90 yd (32 to 82 m) worsted-weight cotton
- G-6 (4 mm) crochet hook
- 8 locking stitch markers
- Yarn needle
- Scissors
There is no shaping at all in this crochet catchall tray. You make a flat square of single crochet, pinch each corner, and secure it with a few stitches so the edges stand up into low walls. It is a quick project for keys by the door, rings on a dresser or remotes on the coffee table.
Materials
- Worsted-weight (#4 medium) cotton: roughly 35 yards (32 m) for the small tray, 60 yards (55 m) for the medium and 90 yards (82 m) for the large
- G-6 (4 mm) hook
- 8 locking stitch markers or safety pins
- Yarn needle and scissors
The hook is smaller than usual for this yarn on purpose. A tray needs a dense fabric, and firm cotton gives it. If you are unsure which cotton to choose, the guide to the best yarn for crochet home decor compares the options.
Gauge and three sizes
18 sc and 20 rows = 4 in (10 cm), which is 4.5 stitches and 5 rows per inch. Check it on your first few rows: at this gauge, the piece is square when the number of rows is a little higher than the number of stitches.
| Size | Chain | Sc per row | Rows | Flat square | Pinch point | Finished base |
|---|---|---|---|---|---|---|
| Small | 28 | 27 | 30 | 6 in (15 cm) | 5 sts / 5 rows | About 4 in (10 cm) |
| Medium | 37 | 36 | 40 | 8 in (20 cm) | 5 sts / 5 rows | About 6 in (15 cm) |
| Large | 46 | 45 | 50 | 10 in (25 cm) | 6 sts / 6 rows | About 7.5 in (19 cm) |
The walls are about 1 in (2.5 cm) high on the small and medium trays and about 1.25 in (3 cm) on the large. Each pinched corner takes its wall height off both ends of an edge, so the base is always the flat square minus two wall heights.
Abbreviations (US terms)
- ch = chain
- sc = single crochet
- sl st = slip stitch
- st/sts = stitch/stitches
- RS / WS = right side / wrong side
Crochet the square
Instructions are written for the medium tray. For the other sizes, substitute the chain, stitch and row numbers from the table.
- Ch 37.
- Row 1: Sc in the 2nd ch from the hook and in each ch across. (36)
- Rows 2 to 40: Ch 1, turn, sc in each st across. (36)
- Measure. The piece should be 8 in (20 cm) on every side. If it is taller than it is wide, pull out a row or two; if it is short, add one.
- Rim round: Do not fasten off. Ch 1 for the first corner and rotate the work to go down the side edge. Sl st in each row end down the side (40), ch 1 at the corner, sl st in each foundation ch across the bottom (36), ch 1, sl st in each row end up the second side (40), ch 1, sl st in each st across the top (36), and join with a sl st to the first sl st. (152 sl st and 4 ch-1 corners)
- Fasten off and weave in the ends.
The slip stitch rim adds almost no width. Its job is to tighten the edge so the walls do not flare outward. Keep the slip stitches even and not too tight, or the square will pucker.
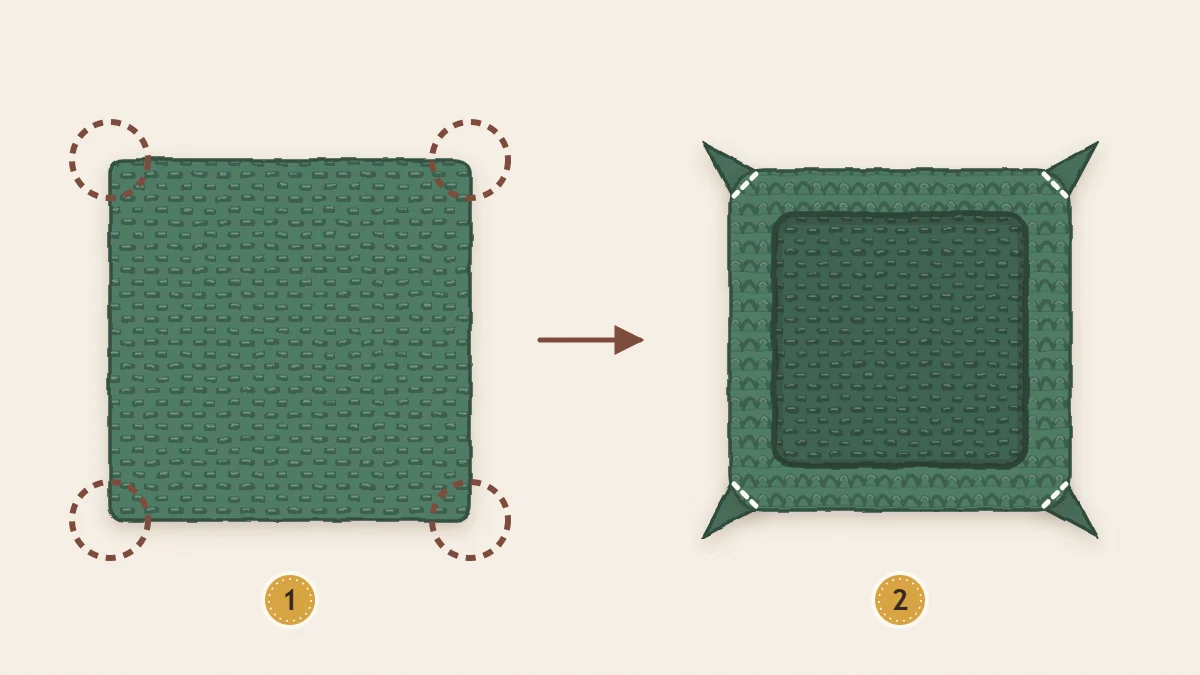
Pinch and stitch the corners
- Lay the square flat, WS up. The WS becomes the inside of the tray.
- Starting at one corner, count 5 stitches along the top or bottom edge and place a marker. Count 5 row ends along the side edge from the same corner and place another. Repeat at all four corners for 8 markers. On the large tray, count 6 instead of 5.
- At the first corner, bring the two markers together so the edges fold upward and the corner itself pokes outward as a small triangle.
- Thread the needle with about 12 in (30 cm) of yarn. Sew the two marked points together at the rim with four or five tight whipstitches, pulling each one snug.
- For a sharper, box-like corner, continue with small stitches straight down from the rim to the base, through both layers. For a softer, pinched look, stop at the rim.
- Knot on the outside, under the triangle, and weave the tail into the seam.
- Repeat at the other three corners, then remove the markers.
The little triangles can be left pointing out, which gives the classic pinched look, or folded flat against one wall and tacked down with two stitches for a neater outline.
Tips for a stiff, tidy tray
- Go tighter, not looser. If the walls flop, the fabric is too soft. Drop to a smaller hook, or hold two strands of yarn together and re-check the gauge, since doubled yarn will make a larger square from the same counts.
- Count the pinch points carefully. A tray leans when one corner is pinched a stitch deeper than the others. All eight markers must be the same distance from their corner.
- Block before pinching. A square that is pinned out and dried flat folds into even walls. The pinning method is in the guide to blocking and finishing crochet decor.
- Stiffen if needed. A light mist of spray starch, shaped and left to dry, adds hold. Test it on a swatch first, because it can change the feel of the cotton.
Tip
Want taller walls? Move every marker one stitch farther from its corner. Each extra stitch raises the walls by about a quarter inch (6 mm) and shrinks the base by about half an inch (1.2 cm), so start with a bigger square if you need the same floor space.
Ways to use the three sizes
The small tray suits rings, earrings, hair ties and paper clips. The medium holds keys and sunglasses by the door. The large takes two remotes or a phone and glasses on a nightstand. Made in one color family, the three nest inside each other when not in use.
For contrast, work the rim round in a second color, or stripe the square by changing color every 10 rows. Trays pair well with other small table pieces: a set of easy crochet coasters in the same cotton makes a coordinated coffee-table group, and a crochet storage basket handles the bigger items a tray cannot.
Frequently asked questions
Why is my square not square?
Single crochet stitches are slightly wider than they are tall, so a square needs more rows than stitches. If your piece is a rectangle, measure it and add or remove rows until the height matches the width. Row count matters less than the measurement.
Can I undo the corners and store the tray flat?
Yes, if you stop the corner stitching at the rim and knot it where you can find it again. Snip the knot, pull out the few stitches and the tray returns to a flat square. Corners sewn all the way down to the base are meant to be permanent.
Is this tray suitable for hot items?
It is designed for small everyday objects, not as a trivet. Cotton tolerates warmth better than acrylic, but a single layer of crochet does little to protect a surface from heat. Use a purpose-made thick cotton hot pad for anything straight from the stove.