Crochet Bedside Caddy With Three Hanging Pockets
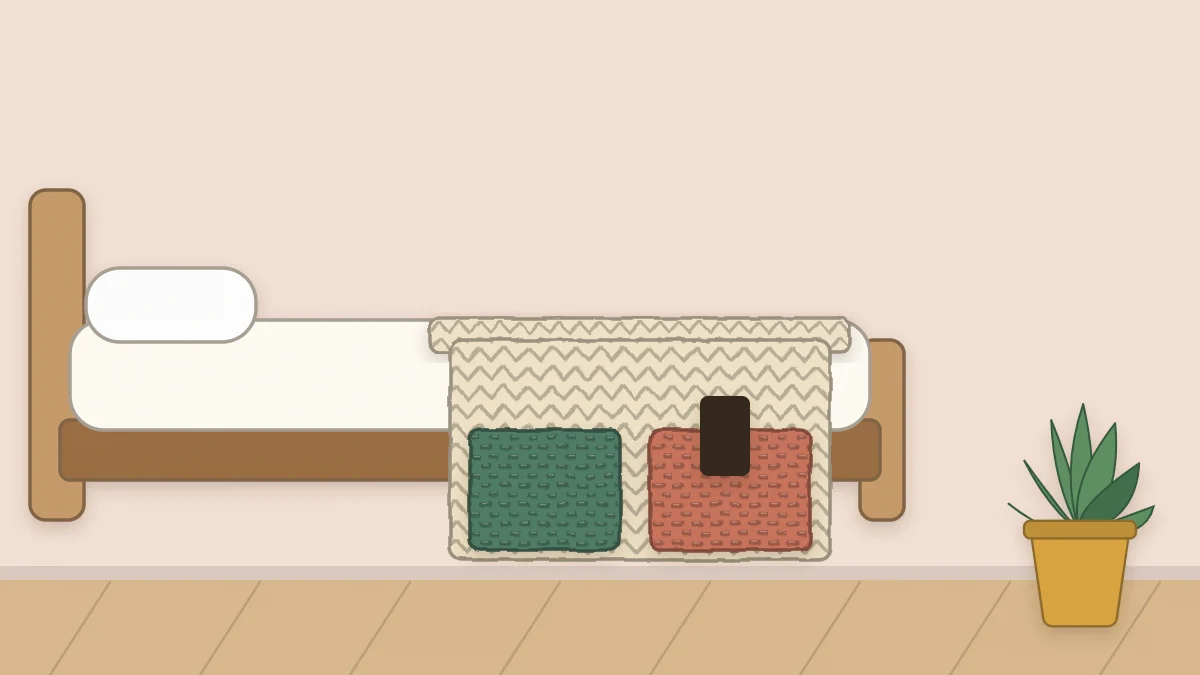
A sturdy crochet bedside caddy made from one long single crochet panel: a flap that tucks under the mattress and three pockets for a book, phone and glasses.
Project at a glance
Materials
- #4 worsted cotton, about 400 yd (366 m)
- G-6 (4 mm) crochet hook
- Yarn needle
- 4 locking stitch markers
- Scissors and tape measure
- Optional strip of non-slip shelf liner
No nightstand, or one that is always full? A crochet bedside caddy hangs from the side of the bed and keeps a book, a phone and a pair of glasses within reach. It is one long rectangle of firm single crochet: one end tucks under the mattress, the other folds up into three pockets.
How the Caddy Works
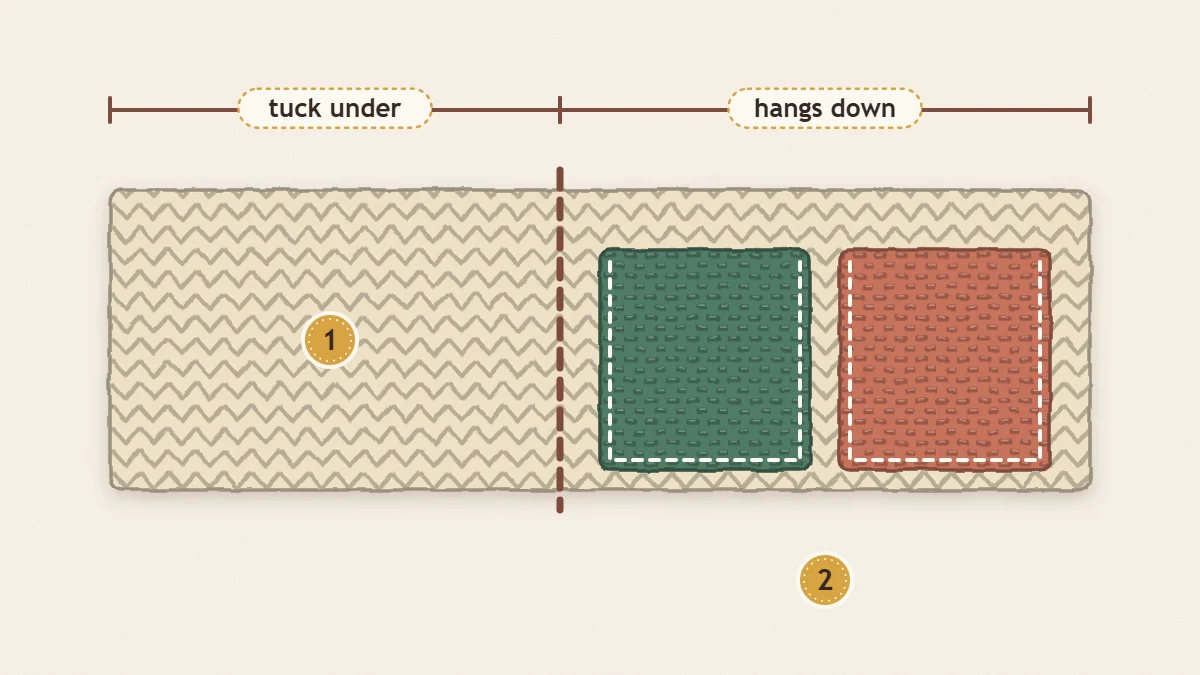
The panel is 15 in (38 cm) wide and 26 in (66 cm) long before folding. The first 12 in (30 cm) slide between the mattress and the bed base, where the weight of the mattress holds everything in place. The rest hangs down the side of the bed, and the last 6 in (15 cm) fold upward and are stitched into pockets.
| Section | Rows | Length |
|---|---|---|
| Tuck-under flap | 1 to 54 | 12 in (30 cm) |
| Hanging back panel | 55 to 90 | 8 in (20 cm) |
| Pocket front (folded up) | 91 to 117 | 6 in (15 cm) |
Once folded, the hanging part shows 2 in (5 cm) of plain panel above a row of 6 in (15 cm) deep pockets.
Yarn, Hook and Materials
Pockets need a fabric that does not sag, so choose a firm, non-stretchy fiber and a hook slightly smaller than the yarn label suggests. Worsted-weight cotton is the easy choice; the guide to the best yarn for crochet home decor compares it with the alternatives.
- #4 worsted cotton, about 400 yd (366 m)
- G-6 (4 mm) crochet hook
- Yarn needle
- 4 locking stitch markers
- Scissors and a tape measure
- Optional: a strip of non-slip shelf liner, about 4 x 12 in (10 x 30 cm), plus sewing thread and needle
Gauge and Abbreviations
Gauge: 16 sc and 18 rows = 4 in (10 cm). That is 4 stitches and 4.5 rows per inch, so 60 stitches give the 15 in width and 117 rows give the 26 in length. The fabric should feel dense, with no visible gaps between stitches. If yours is looser, go down one hook size and swatch again.
- ch = chain
- sc = single crochet
- st/sts = stitch/stitches
- BLO = back loop only
Bedside Caddy Panel Pattern
The turning chain does not count as a stitch. Single crochet worked in turned rows looks the same on both faces, so there is no right or wrong side to track.
- Row 1: Ch 61. Sc in the 2nd ch from the hook and in each ch across (60 sc).
- Rows 2 to 54: Ch 1, turn, sc in each st across (60 sc). This completes the tuck-under flap. Place a marker in each end of Row 54.
- Rows 55 to 90: Ch 1, turn, sc in each st across (60 sc). This is the back panel.
- Row 91 (fold line): Ch 1, turn, sc in the BLO of each st across (60 sc). The unworked front loops leave a ridge that marks the bottom of the pockets.
- Rows 92 to 117: Ch 1, turn, sc in both loops of each st across (60 sc). Do not fasten off after Row 117.
Count the last section before moving on: Rows 91 to 117 make 27 rows, which is 6 in at this gauge.
Folding and Stitching the Pockets
Fold the pocket front up along the ridge of Row 91, bending the fabric away from the ridge so the ridge sits on the outside of the fold. The top edge of the pocket now lies 27 rows above the fold, level with Row 64. Pin both sides.
- First side seam: With the working yarn still attached at the pocket’s top corner, ch 1 and sc down the side through both layers, one sc in each row-end (27 sc). Fasten off.
- Second side seam: Join yarn at the fold on the other side and sc up through both layers in the same way (27 sc). Fasten off.
- Book pocket: Counting along the pocket’s top edge from one side, place a marker between stitches 28 and 29. This pocket is 28 sts, or 7 in (18 cm), wide.
- Phone and glasses pockets: Place a second marker between stitches 44 and 45. The two remaining pockets are 16 sts each, or 4 in (10 cm) wide. Check the sum: 28 + 16 + 16 = 60.
- Dividers: Thread a yarn needle with a 20 in (51 cm) length of yarn. At each marker, backstitch a straight vertical line through both layers from the pocket’s top edge down to the fold, following one column of stitches. Work two extra stitches over the top edge, where the strain is greatest.
Finishing and Fitting It to the Bed
Weave in every tail through at least 2 in (5 cm) of stitches, doubling back once; pocket seams get tugged daily, and short tails work loose. The methods in the guide to finishing crochet home decor apply here without changes.
Slide the flap between the mattress and the base up to the markers in Row 54, then remove the markers. On a slippery base, hand-sew the strip of non-slip shelf liner across the underside of the flap so it grips.
Watch out
The caddy is held only by the weight of the mattress, so keep the load light: a paperback, a phone, glasses, a remote. Heavy hardcovers, tablets and drinks belong on a shelf. Run charging cables where they cannot be pinched under the mattress.
Changing the Size
Flat pockets suit slim objects. The 7 in book pocket takes a paperback about 5.5 in (14 cm) wide and up to 1 in (2.5 cm) thick. For thicker books, widen the panel: every 4 extra chains add 1 in (2.5 cm), and all of them go to the book pocket.
- Deeper pockets: work 9 more rows in the back panel and 9 more in the pocket front for 2 in (5 cm) of extra depth, so the two layers stay matched.
- Thick or pillow-top mattress: lengthen the flap. Each extra 9 rows add 2 in (5 cm) of grip.
- Two wide pockets: place a single divider between stitches 30 and 31.
If you would rather keep storage off the bed, the same pocket idea becomes a wall piece in the crochet hanging organizer, and the caddy fits neatly into a wider plan for crochet bedroom accents.
Frequently asked questions
Will the caddy stay in place on a platform bed?
Usually, because the mattress still rests on the flap. Slatted or very smooth platforms give less grip, so sewing a strip of non-slip shelf liner under the flap is worth the few extra minutes.
Can I use acrylic yarn instead of cotton?
You can, but acrylic has more stretch, so the pockets may sag sooner. If you use it, go down a hook size to make the fabric as dense as possible and keep the contents light.
Why are the pocket dividers sewn instead of crocheted?
A backstitched line through both layers is flat, strong and easy to position exactly between two stitches. It can also be unpicked and moved later if you want different pocket widths.